 Check out my latest release! 🙌
 This is my new release, please have a listen 🙌

 'Edit Solo' / 'Record' in MIDI Editors follow focus
If this option is activated, and Record in Editor or Solo Editor is activated in a MIDI editor, these options follow the focus. That is, if the Project window gets the focus, Record in Editor and Solo Editor are suspended in the MIDI editor.
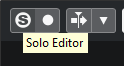
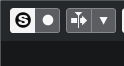
Explanation: if deactivated, 'Solo Editor' or 'Record in Editor' of MIDI editors (i.e. piano roll) doesn't get suspended when user focuses Arrangement view.
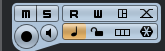
 Default Track Time Type
This allows you to specify the default track time type for new tracks. When you change this setting, all new tracks will use the selected time type.
Musical - all added tracks are set to musical time type. The respective button shows a note symbol.
Time Linear - all new audio tracks use linear time base. The respective button shows a clock symbol.
Follow Transport Main Display - new tracks use the primary time format setting on the transport panel. When this is set to Bars+Beats, tracks with musical time base will be added. When this is set to any of the other options (Seconds, Timecode, Samples, etc.), all new tracks will use linear time base.
 Display Warning before Deleting Non-Empty Tracks
If this option is activated, a warning message is displayed if you delete tracks that are not empty.
Select Track on Background ClickThis allows you to select a track by clicking in the event display background.
 Auto Select Events under Cursor
If this option is activated, all events in the Project window or in an editor that are touched by the project cursor are automatically selected. This can be helpful when you rearrange your project, because it allows you to select whole sections (on all tracks) simply by moving the project cursor.
Cycle Follows Range SelectionIf this option is activated, range selections that you make in the Sample Editor will be mirrored in the Project window as well. This lets you audition a range in the Sample Editor as a loop with the main transport controls, rather than with the Audition and Audition Loop controls in the Sample Editor.
 Delete Overlaps
If this option is activated and you move, size, or nudge an event so that it partly overlaps another event, the other event is automatically resized so that the overlapped (hidden) section is removed. Hold Shift while moving to override this setting.
Parts Get Track NamesIf this option is activated and you move an event from one track to another, the moved event will automatically be named according to its new track. Otherwise, the event will retain the name of the original track.
 Lock Event Attributes
This setting determines which properties are affected when you lock an event (by selecting Lock from the Edit menu). You can select any combination of the following 3 options:
Position
If this is locked, the event cannot be moved.
Size
If this is locked, the event cannot be resized.
Other
If this is locked, all other editing of the event is disabled. This includes adjusting the fades and event volume, processing, etc.
Quick ZoomIf this option is activated, the contents of parts and events will not be continuously redrawn when you zoom manually. Instead, the contents are redrawn once you have stopped changing the zoom – activate this if screen redraws are slow on your system.
Use Up/Down Navigation Commands for Selecting Tracks onlyIf this option is deactivated and no event/part is selected in the Project window, the Up Arrow/Down Arrow keys are used to step through the tracks in the track list.
If this option is deactivated and an event/part is selected in the Project window however, the Up Arrow/Down Arrow keys still step through the tracks in the track list. Only on the selected track, the first event/part will also be selected.
If this option is activated, the Up Arrow/Down Arrow keys are only used to change the track selection – the current event/part selection in the Project window will not be altered.
Track Selection follows Event SelectionIf this option is activated and you select an event in the Project window, the corresponding track is also automatically selected.
Automation Follows EventsIf this option is activated, automation events will automatically follow when you move an event or part on the track.
This facilitates setting up automation that is related to a specific event or part, instead of a specific position in the project. For example, you can automate the panning of a sound effect event (having the sound pan from left to right, etc.) – if you need to move the event, the automation will automatically follow. The rules are:
All automation events for the track between the start and end of the event or part will be moved. If there are automation events in the position to which you move the part or event, these will be overwritten.
If you duplicate an event or part, the automation events will be duplicated as well.
This function also affects copying and pasting.
 Drag Delay
When you click and drag an event, this setting determines the delay before the event is moved. This helps you avoid accidentally moving events when you click on them in the Project window.
Treat Muted Audio Events like DeletedIf you have 2 overlapping audio events in your project and you mute the top one (the event you hear during playback), playback of the other (obscured) event will still only start at the end of the overlapping section.
If this is not what you want, Treat Muted Audio Events like Deleted allows you to immediately play the obscured event when muting the top event.
Use Mouse Wheel for Event Volume and FadesIf this option is activated, you can use the mouse wheel to move the event volume curve up or down.
When you hold down Shift while moving the mouse wheel, the fade curves will be affected. To move the end point of the fade in, position the mouse in the left half of the event. To move the start point of the fade out, position the mouse in the right half of the event.
 On Import Audio Files
This setting determines what happens when importing an audio file into a project:
Open Options Dialog
An Import Options dialog opens when you import, allowing you to select whether you want to copy the file to the audio folder and/or convert it to the project settings.
Use Settings
Allows you to set the following standard actions:
Copy Files to Working Directory — copies the files to the project’s audio folder before import.
Convert and Copy to Project If Needed — copies the files to the project’s audio folder before import and converts them if the files have a different sample rate or a lower resolution than the project settings.
Split channels/Split multi-channel files — copies the files to the project’s audio folder and splits stereo or multi-channel audio files into a corresponding number of mono files – one for each channel. Use the Split File Name Format pop-up menu to specify how the split files are named. This allows for compatibility with other products when exchanging audio files and avoids confusion if the source file contains no stereo or surround material, but poly-mono audio.
Remove Regions/Hitpoints on all Offline ProcessesIf this option is activated, and you perform offline processing on an audio range that contains regions, these will be removed.
 On Processing Shared Clips
This setting determines what happens when you apply processing to a shared clip, that is, a clip that is used by more than one event in the project:
Open Options Dialog
An Options dialog appears, allowing you to select whether you want to create a new version of the clip or apply the processing to the existing clip.
Create New Version
A new editing version of the clip is automatically created, and the processing is applied to that version (leaving the original clip unaffected).
Process Existing Clip
The processing is applied to the existing clip (which means that all events playing that clip will be affected).
Enable Automatic Hitpoint DetectionIf this option is activated, and you add an audio file to your project by recording or by importing, Cubase automatically detects its hitpoints. This allows you to navigate to hitpoints of an audio file from within the Project window.
 Time Stretch Tool Algorithm
Use this option to select a default algorithm that is applied when using the Object Selection tool in Sizing Applies Time Stretch mode. This mode allows you to resize parts and events in the Project window and apply time stretch to their contents in the process, so that the audio material is adjusted to fit the new length of the part or event. The following settings are available:
MPEX – Preview Quality
Use this mode only for preview purposes.
MPEX – Mix Fast
This mode is a very fast mode for preview. This works best with composite music signals (mono or stereo material).
MPEX – Solo Fast
Use this mode for single instruments (monophonic material) and voice.
MPEX – Solo Musical
Same as above but higher quality.
MPEX – Poly Fast
Use this for processing monophonic and polyphonic material. This is the fastest setting that still provides very good results. You can use this for drum loops, mixes, or chords.
MPEX – Poly Musical
Use this for processing monophonic and polyphonic material. This is the recommended MPEX default quality setting. You can use this for drum loops, mixes, or chords.
MPEX – Poly Complex
This high quality setting produces high CPU load. Use this setting when processing difficult material or for stretch factors above 1.3.
Realtime
This algorithm is much quicker and allows for better CPU performance than MPEX, but produces a lower sound quality.
 Default Warping Algorithm
Determines which warp algorithm is used for new audio clips in the project.
‘X’ Chords Mute Notes on Tracks That are in Follow Chord Track ModeThis determines what happens when you play back a track that follows the chord track and the cursor reaches an undefined chord event (X chord). Activate this option to mute playback. Deactivate this option to continue playback of the last defined chord event.
Disable ‘Acoustic Feedback’ during PlaybackIf you activate this option, Acoustic Feedback is automatically disabled on playback. This ensures that chord events are not triggered twice.
Hide muted Notes in EditorsIf you set up a MIDI track to follow the chord track by activating one of the Follow Chord Track options, some of the original MIDI notes may be muted. Activate this option to hide these notes in the editors.
 Value Box/Time Control Mode
The menu contains the following options:
Text Input on Left-Click
In this mode, clicking a value box will open it for editing by typing.
Increment/Decrement on Left/Right-Click
In this mode, you can click with the left or right mouse button to decrease or increase the value. To edit values by typing in this mode, please double-click. Under Mac OS, right-clicking is the same as Ctrl/Cmd-clicking. We recommend that you use a 2-button mouse and set up the right button to generate a Ctrl/Cmd-click.
Increment/Decrement on Left-Click and Drag
In this mode, you can click and drag up or down to adjust the value (much like dragging a vertical fader). Double-click to enter values manually.
 Knob Mode
The menu contains the following options:
Circular
To move an encoder, click on it and drag in a circular motion, such as turning a real encoder. When you click anywhere along the encoder’s edge, the setting is immediately changed.
Relative Circular
Works like the Circular option, but clicking does not automatically change the setting. This means you can make adjustments to the current setting by clicking anywhere on an encoder and dragging. There is no need to click on the exact current position.
Linear
To move an encoder, click on it and drag up or down (or left or right) with the mouse button pressed – as if the encoder was a vertical (or horizontal) slider.
 Slider Mode
The menu contains the following options:
Jump
In this mode, clicking anywhere on a slider will make the slider handle instantly move to that position.
Touch
In this mode, you have to click on the actual slider handle to adjust the parameter. This reduces the risk of accidentally moving sliders.
Ramp
In this mode, clicking anywhere on a slider (but not on the actual handle) and keeping the mouse button pressed causes the handle to move smoothly to the new position.
Relative
In this mode, clicking on a slider will not immediately change the setting. Instead you click and drag up or down – the setting will be changed according to how far you drag, not according to where you click.
Select Controllers in Note Range: Use Extended Note ContextIf this option is activated and you move notes together with their controllers, for example, in the Key Editor, the extended note context will be taken into account. This means that controllers between the last selected note and the following note (or the end of the part) will also be moved. If this option is deactivated, only the controllers between the first and the last selected note will be moved.
 Legato Overlap
Determines the result of the Legato function on the MIDI menu.
If Legato Overlap is set to 0 Ticks, the Legato function extends each selected note so that it reaches the next note exactly.
Setting Legato Overlap to a positive value causes the notes to overlap by the specified number of ticks.
Setting Legato Overlap to a negative value makes the Legato function leave a slight gap between the notes.
Legato Mode: Between Selected Notes OnlyIf this option is activated, the length of selected notes will be adjusted so that they reach the next selected note, allowing you to apply Legato only to your bass line, for example.
Split MIDI EventsIf you split a MIDI part in the Project window (with the Cut tool or one of the split functions) so that the split position intersects one or several MIDI notes, the result depends on this setting.
If Split MIDI Events is activated, the intersected notes are split. This creates new notes at the beginning of the second part.
If Split MIDI Events is deactivated, the notes will remain in the first part, but stick out after the end of the part.
Split MIDI ControllersIf you split a MIDI part containing controllers, the result depends on this setting:
If Split MIDI Controllers is activated and the part contains a controller with a value other than zero at the split position, a new controller event (of the same type and value) will be inserted at the split position (at the start of the second part).
If Split MIDI Controllers is deactivated, no new controller events will be inserted.
If you just split a part and play back the result, it will sound the same regardless of this setting. However, if you split a part and delete the first half or move the second half to a different position in the project, you may want to activate Split MIDI Controllers to make sure all controllers have the correct value at the beginning of the second part.
Select Channel/Track on SoloWhen you activate this option, a track in the track list or a channel in the MixConsole automatically gets selected if Solo is activated. Deactivating this option always keeps the current selection status, regardless of the solo setting for the tracks.
Select Channel/Track on Edit SettingsWhen you activate this option, a track in the track list or a channel in the MixConsole automatically gets selected when you click the respective edit button. Deactivating this option always keeps the current track/channel selection.
Scroll to selected TrackIf you activate this option, selecting a MixConsole channel automatically scrolls the track list to display the respective track.
Sync Selection in Project Window and MixConsoleIf this option is activated, and you select a track in the Project window, the corresponding channel is automatically selected in the MixConsole and vice versa.
This can be a very handy feature when making detailed settings for audio and MIDI channels: open the Channel Settings window for a track by clicking its edit button, and position it so that it can remain open without obstructing the view. Then you can simply select the track for which you want to make settings in the Project window. The Channel Settings window will automatically change to show the settings for the selected track.
Enable Record on Selected MIDI TrackIf this option is activated, the selected MIDI tracks are automatically record-enabled.
Enable Record on Selected Audio TrackIf this option is activated, selected audio tracks are automatically record-enabled.
Enable Solo on Selected TrackIf this option is activated, the selected tracks are automatically soloed.
Deep Track FoldingIf this option is activated, any folding settings that you make on the Track Folding submenu of the Project menu also affect the subelements of the tracks. For example, if you fold in a folder track that contains 10 audio tracks, of which 5 have several open automation tracks, all these audio tracks within the folder track will also be folded in.
Enlarge Selected TrackActivate this option to enter a mode where the selected track in the Project window will be enlarged. You can adjust the size directly in the track list if the default enlargement factor does not suit you. When you select another track in the track list, this track is automatically enlarged, and the previously selected track is displayed in its previous size.
On this page you can specify which modifier keys are used for additional functionality when using tools.
The current modifier key(s) for the action is replaced. If this tool already has assigned modifier key(s), you will be asked whether you want to replace them.
| Controls | Reset to default value | Ctrl | |
| Drag n Drop | Constrain Direction | Ctrl | |
| Copy | Alt | ||
| Share Copy | Alt + Shift | ||
| Erase tool |  | Delete later events | Alt |
| Glue tool |  | Glue all following events | Alt |
| Info line | All events same value | Ctrl | |
| Range tool |  | Exclude row | Ctrl |
| Select full vertical | Ctrl + Shift | ||
| Select tool |  | Edit velocity | Shift |
| Set position | Ctrl + Shift | ||
| Slip event | Ctrl + Alt | ||
| Split event | Alt | ||
| Size objects | Common position | none | |
| Disable snapping | Ctrl | ||
| Repeat event | Alt | ||
| Time stretch | None | ||
| Split tool |  | Split repeated | Alt |
| Time wrap tool | Adjust or delete | Shift | |
| No correction | Alt | ||
| Trim tool | Constrain direction | Ctrl | |
| Trim start | Alt |
If this option is activated, the toolbox opens on right-click in the event display and editors. You can change the number of rows in which the tools are arranged on the toolbox. Keep the right mouse button pressed until the mouse pointer changes to a double arrow and drag to the bottom or right.
To open the context menu instead of the toolbox, press any modifier key when right-clicking.
This allows you to set up a cross-hair cursor when working in the event display and editors, facilitating navigation and editing, especially when arranging in large projects. You can set up the colors for the line and the mask of the cross-hair cursor, and define its width. The cross-hair cursor works as follows:
If the Selection tool (or one of its subtools) is selected, the cross-hair cursor appears when you start moving or copying a part/event or when you use the event trim handles.
If the Draw tool, the Cut tool, or any other tool that makes use of this function is selected, the cross-hair cursor appears as soon as you move the mouse over the event display.
The cross-hair cursor is only available for tools where such a function is of any use.
Show vertical line
Show horizontal line
 Mask width
If the Key Editor, Drum Editor or the Audio Part Editor is open in the lower zone of the Project window and Link Project and Lower Zone Cursors is activated, the cross-hair cursor is shown in the lower zone editor and in the Project window.
Zoom Tool Standard Mode: Horizontal Zooming OnlyThis affects the result when using the Zoom tool (magnifying glass).
If this option is activated and you drag a selection rectangle with the Zoom tool, the window is only zoomed horizontally and the track height does not change. If this option is deactivated, the window is zoomed both horizontally and vertically.
Select Tool: Show Extra InfoActivate this to show a tooltip for the Object Selection tool in the Project window event display. This tooltip indicates the current pointer position and the name of the track and event at which you are pointing.
Show Notification when switching Tool Mode with key commandIf this option is activated, a warning opens if you select the Timewarp tool and the ruler is not set to Bars and Beats.
Use Drum Editor when Drum Map is assignedIf this option is activated, parts on MIDI tracks to which drum maps are assigned are shown with drum note symbols. The parts will automatically open in the Drum Editor on double-click. This overwrites the Default MIDI Editor setting.
 Default MIDI Editor
Determines which editor is opened when you double-click a MIDI part or when you select it and press Ctrl/Cmd-E. Note that this setting is overwritten for tracks with drum maps if the Use Drum Editor when Drum Map is assigned option is activated.
Editor Content Follows Event SelectionIf this option is activated, the parts or events shown in the open editor will follow the selection that you make in the Project window.
Determines where an editor is opened when you double-click an audio event or a MIDI part or when you use the key command assigned to Open/Close Editor.
Determines where an editor is opened when you use an open command from the Audio or MIDI menu or the corresponding key commands.
Show Event NamesDetermines whether the names of parts and events are shown.
Hide Truncated Event NamesWhen zooming or resizing elements, the events can become very small so that the name is no longer completely visible. The name gets truncated. If this option is activated, event names are hidden if they do not fit into the event.
 Show Overlaps
When events overlap, this setting allows you to specify when the overlapping areas are displayed.
 Grid Overlay Intensity
Increases or decreases the overlay intensity of the displayed grid lines.
 Event Handling Opacity
Increases or decreases the opacity of an overlying event background when you move it.
 Event Opacity
Sets the opacity of the event background.
 Smallest Track Height To Show Data
Specifies from which track height the track contents are displayed.
 Smallest Track Height To Show Name
Specifies from which track height the track names are displayed.
Interpolate Audio WaveformsIf you have zoomed in to one sample per pixel or less, the appearance of the samples depends on this setting. If this option is deactivated, single sample values are drawn as steps. If this option is activated, the sample values are interpolated to form curves.
Show Event Volume Curves AlwaysIf this option is activated, event volume curves, as created by the fade and volume handles, are shown for all events, regardless of whether they are selected or not. If this option is deactivated, volume curves are only shown for selected events. However, note that you can still adjust fades and volumes for events that are not selected, by clicking and dragging the top left, middle, or right edge respectively.
Show WaveformsIf this option is activated, audio waveforms are displayed for audio events.
Show Hitpoints on Selected EventsIf this option is activated, hitpoints are displayed for audio events.
Waveform BrightnessIncreases or decreases the brightness of the displayed waveforms.
Waveform Outline IntensityIncreases or decreases the intensity of the waveform outline.
Fade Handle BrightnessIncreases or decreases the brightness of the set fade lines within audio events.
Background Color ModulationIf this option is activated, the backgrounds of audio waveforms reflect the waveform dynamics. This is especially useful to get an overview when working with small track heights.
The Note Name pop-up menu lets you select between 3 ways of displaying chords: English, German, and Solfège.
The Naming Format pop-up menu lets you determine how MIDI note names (pitches) are displayed in editors, etc. The options are: MIDI, MIDI + MIDI Note Number, and Classic (Helmholtz).
The options Display ‘Bb’ as ‘B’ and Display ‘B’ as ‘H’ allow you to change the corresponding pitch names.
If you activate Enharmonics from Chord Track, and your project contains a chord track with chord events, these chord events determine if the enharmonically equivalent notes in the Key Editor and in the List Editor are displayed as sharp or flat.
Allows you to specify a font for all chord symbols.
There are several ways of indicating chord types, for example, major and minor chords. These options allow you to select your preferred display method for major 7th chords, minor chords, half-diminished chords, diminished chords, and augmented chords.
You can modify the default chord symbols that are used on the chord track, for the chord pads, and in the Score Editor.
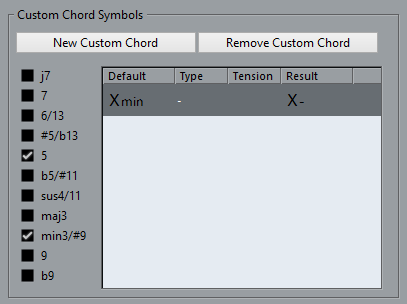
The New Custom Chord button allows you to add a new custom chord symbol.
The options to the left allow you to specify the chord for which you want to change the chord symbol.
Click the Type and Tension fields and enter your custom symbol.
You must define custom symbols for each set of tensions.
The Result field shows how the chord will be displayed.
The Remove Custom Chord button allows you to remove the custom chord symbol that is selected in the list.
Show Event DetailsIf this option is activated, event details are displayed. If this option is deactivated, data blocks are displayed.
This setting depends on the Show Data on Folder Tracks setting.
 Show Data on Folder Tracks
Determines in which case data blocks or event details are displayed on folder tracks.
Always Show Data
If this option is activated, data blocks or event details are always displayed.
Never Show Data
If this option is activated, nothing is displayed.
Hide Data When Expanded
If this option is activated, the display of events is hidden when you open folder tracks.
 Part Data Mode
Determines if and how events in MIDI parts are shown: not shown, as lines, as score notes, as drum notes, or as blocks. Note that this setting is overwritten for tracks with drum maps if the Use Drum Editor when Drum Map is assigned option is activated.
Show ControllersGoverns whether non-note events such as controllers, etc. are shown in MIDI parts.
Note BrightnessIncreases or decreases the brightness of note events.
Controller BrightnessIncreases or decreases the brightness of controller events.
 Show Marker Lines
Allows you to specify if marker lines are shown on other tracks in the Project window.
Off
Marker lines are only shown on marker tracks.
From Active Marker Track
Marker lines of the active marker track are shown on other tracks in the Project window.
From All Marker Tracks
Marker lines of all marker tracks are shown on other tracks in the Project window.
 Default Track Name Width
Allows you to determine the default name width for all track types.
Enable HiDPI (Windows only)Enables the appropriate resolution to render Cubase GUI elements sharp and precise on high resolution displays with supported scaling factors of 100 %, 125 %, 150 %, 175 %, and 200 %.
Note Other scaling factors, such as 133 %, are not supported.
Note On macOS, you can disable HiDPI support in the Cubase application folder by invoking Get Info and checking Open in Low Resolution.
 Application Scaling
Enable Usage Logging
Application Scaling
Enable Usage LoggingIf you activate this option, Cubase gathers usage information and writes it in a log file that you can find in the following location:
On Windows: "\Users\user_name\AppData\Local\Steinberg\usagelogger"
On macOS: "/Users/user_name/Library/Logs/Steinberg/usagelogger"
Activating this option to write such a file, and then sending the file to the Steinberg support team can be useful if Cubase crashes, and the crash dump files do not reveal enough information.
By default, Enable Usage Logging is deactivated. We recommend that you deactivate it when you no longer need it.
 Language
Allows you to select which language is used in the program. After switching the language, you must restart the program for the change to take effect.
Auto SaveIf this option is activated, Cubase automatically saves backup copies of all open projects with unsaved changes. These are named Name.bak, where name is the name of the project, and are saved in the project folder. Backup copies of unsaved projects are named #UntitledX.bak where X is an incremental number, to allow multiple backup copies in the same project folder.
 Auto Save Interval
Allows you to specify how often a backup copy is created.
 Maximum Backup Files
Allows you to specify how many backup files will be created with the Auto Save function. When the maximum number of backup files is reached, the existing files will be overwritten (starting with the oldest file).
Show TipsIf this option is activated and you position the pointer over an icon or button in Cubase, an explanatory tooltip is displayed after a second.
Maximum Undo StepsAllows you to specify the number of undo levels.
Run Setup on Create New ProjectIf this option is activated, Cubase automatically displays the Project Setup dialog every time you create a new project. This allows you to specify the basic project configuration.
 Open Projects in Last Used View
Allows you to select whether projects are opened using their original window layout and settings, or using the view that you last used on your computer. This can either be the last used view that was saved on your computer or one of your specified global workspaces.
Never
Projects are always opened using their original window layout and settings.
Only External Projects
Projects that have been created on a different computer are opened using the view that you last used on your computer. Projects that have been created on this computer are opened using their original window layout and settings.
Always
Projects are always opened using the view that you last used on your computer.
Use HubActivate this option to open the Hub when you start Cubase or create a new project using the File menu.
 Default Author Name
Allows you to specify an author name that is used by default for new projects. This will be included as metadata when exporting audio files with an iXML chunk.
Default Company NameAllows you to specify a company name that is used by default for new projects. This will be included as metadata when exporting audio files with an iXML chunk.
MIDI Thru ActiveIf this option is activated, all MIDI tracks that are record-enabled or have monitoring activated will “echo” incoming MIDI data, sending it back out on their respective MIDI outputs and channels. This allows you to hear the correct sound from your MIDI instrument during recording.
If you use MIDI Thru, select Local Off mode on your MIDI instrument to prevent each note from sounding twice.
Reset on StopIf this option is activated, Cubase sends out MIDI Reset messages (including noteoff and controller resets) on stop.
Never Reset Chased ControllersIf this option is activated, controllers are not reset to 0 when you stop playback or move to a new position in the project.
This allows you to enter a length adjustment value in ticks by which the notes that have the same pitch and MIDI channel are adjusted. This ensures that there is always a short time between the end of one note and the start of another. By default, there are 120 ticks per 1/16 note, but you can adjust this with the MIDI Display Resolution setting.
Event types for which an option is activated are chased when you locate to a new position and start playback. This makes your MIDI instruments sound as they should when you locate to a new position and start playback.
If Chase not limited to Part Boundaries is activated, MIDI controllers are also chased outside the part boundaries, and the chase is performed on the part touched by the cursor as well as on all the parts to the left of it. Deactivate this for very large projects, as it slows down processes such as positioning and soloing.
This allows you to set the display resolution for viewing and editing MIDI data. This only affects how MIDI events are displayed and not how they are recorded.
If this option is activated, a reset event is inserted at the end of each recorded part. This resets controller data, such as Sustain, Aftertouch, Pitchbend, Modulation, Breath Control. This is useful if you stop recording before the note off command is sent, for example.
If this option is activated, the layering of MIDI instruments (by MIDI sends) is also active within the MIDI editors. This way, the acoustic feedback of the editors sends the MIDI data not only to the output selected for the track, but additionally through any MIDI inserts and MIDI sends assigned to it. However, this also means that MIDI events will be sent through any MIDI plug-ins assigned to this track.
Allows you to specify the latency of the MIDI playback engine.
Low lowers the latency and increases the responsiveness of the MIDI playback engine. However, this setting might also decrease your computer performance, if your project contains lots of MIDI data.
Normal is the default mode and the recommended setting for most workflows.
High increases the latency and the playback buffer. Use this, if you work with complex VST Instrument libraries or with projects that have a very high performance level.
This allows you to set the maximum length of the notes when using Acoustic Feedback in MIDI editors.
These options allow you to specify what data is included in exported MIDI files.
If this option is activated, the MIDI patch settings in the Inspector - Bank Select and Program Select (used for selecting sounds in the connected MIDI instrument) are included as MIDI Bank Select and Program Change events in the MIDI file.
If this option is activated, Volume and Pan settings made in the Inspector are included as MIDI Volume and Pan events in the MIDI file.
If this option is activated, the automation data (just as it is heard during playback) is converted to MIDI controller events and included in the MIDI file. This also includes automation recorded with the MIDI Control plug-in.
Note that if a continuous controller (e. g. CC7) has been recorded but the Read button is deactivated for the automation track (i. e. the automation is effectively switched off for this parameter), only the part data for this controller will be exported.
If this option is deactivated and the Read Automation button is activated, no continuous controllers will be exported. If the Read button is deactivated, the controller data of the MIDI part are exported (these will now be handled like “regular” part data).
It is recommended to activate the “Export Automation” option.
If this option is activated and you are using MIDI modifiers or any MIDI plug-ins as insert effects, the modifications to the original MIDI notes that occur as a result of the effect(s) will be included in the MIDI file. A MIDI delay, for example, will produce a number of repeats to a MIDI note by actually adding additional, “echoing” notes at rhythmic intervals - these notes will be included in the MIDI file if the option is activated.
If this option is activated and you are using any MIDI plug-ins as send effects, the modifications to the original MIDI notes that occur as a result of the effect(s) will be included in the MIDI file.
If this option is activated, any markers you have added will be included in the MIDI file as Standard MIDI File Marker events.
If this option is activated, the MIDI file will be of Type 0 (all data on a single track, but on different MIDI channels). If you do not check this option, the MIDI file will be of Type 1 (data on separate tracks). Which type to choose depends on what you want to do with the MIDI file (in which application or sequencer it is to be used).
You can specify a MIDI resolution between 24 and 960 for the MIDI file. The resolution is the number of pulses, or ticks, per quarter note (PPQ) and determines the precision with which you will be able to view and edit the MIDI data. The higher the resolution, the higher the precision. The resolution should be chosen depending on the application or sequencer with which the MIDI file will be used though, because certain applications and sequencers may not be able to handle certain resolutions.
If this option is activated, only the range between the left and right locator will be exported.
If this option is activated, any delay settings you have made in the Inspector will be included in the MIDI file.
To include other Inspector settings, you must convert the settings to real MIDI events and properties by using the Merge MIDI in Loop function for each track.
Exported MIDI files include the tempo and time signature events of the Tempo Track Editor or, if the tempo track is deactivated, the current tempo and time signature.
If this option is activated, the first Program Change and Bank Select events for each track are converted to Inspector settings for the track.
If this option is activated, the first MIDI Volume and Pan events for each track are converted to Inspector settings for the track.
If this option is activated, MIDI controller events in the MIDI file will be converted to automation data for the MIDI tracks. If this option is deactivated, controller data for the MIDI parts will be imported.
If this option is activated, the imported MIDI file will be placed so that it starts at the position of the left locator - otherwise it will start at the beginning of the project. Note that if you choose to have a new project created automatically, the MIDI file will always start at the beginning of the project.
If this option is activated, Standard MIDI File Markers in the file will be imported and converted to Cubase markers.
If this option is activated and you drag and drop a MIDI file into the project, the whole file will be placed on a single track.
If this option is activated and you import a MIDI file into the current project, tempo track data in the MIDI file is ignored. The imported MIDI file will play according to the current Tempo track in the project.
If this option is deactivated, the Tempo Track Editor will be adjusted according to the tempo information in the MIDI file.
If this option is activated and you import a MIDI file of type 0 into the project, the file will automatically be “dissolved”: For each embedded MIDI channel in the file, a separate track will be inserted in the Project window.
If this option is deactivated, only one MIDI track will be created. This track will be set to MIDI Channel “Any”, allowing all MIDI events to play back on their original channels. You can also use the “Dissolve Part” function on the MIDI menu to distribute the events onto different tracks (or lanes) with different MIDI Channels at a later stage.
This allows you to specify what happens when you drag a MIDI file into the project:
Select MIDI Tracks to create MIDI tracks for the imported file.
Select Instrument Tracks to create instrument tracks for each MIDI channel in the MIDI file and let the program automatically load appropriate presets.
Select HALion Sonic SE multi-timbral to create several MIDI tracks, each routed to a separate instance of HALion Sonic SE in the VST Instruments window and load the appropriate presets.
Activate this to convert karaoke lyrics in the MIDI file to text that can be displayed in the Score Editor. If this option is deactivated, lyrics are only shown in the List Editor.
This page allows you to prevent certain MIDI messages from being recorded and/or echoed by the MIDI Thru function (thruput).
The page is divided into 4 sections:
Activating any of these options prevents the corresponding type of MIDI message from being recorded. It will, however, be thruput, and if already recorded, it will play back normally.
Activate any of these options to prevent the corresponding type of MIDI message from being thruput. It will, however, be recorded and played back normally.
If you activate a Channel button, no MIDI messages on that MIDI Channel will be recorded or thruput. Already recorded messages will however be played back normally.
Allows you to prevent certain MIDI controller types from being recorded or thruput.
To filter out a controller type, select it from the list at the top of the section and click “Add”. It will appear in the list below.
To remove a controller type from the list (allow it to be recorded and thruput), select it in the lower list and click “Remove”.
 Show File Extensions in Results List
Activate this to display file name extensions in the Results list.
Maximum Items in Results ListThis allows you to specify the maximum number of files that are displayed in the Results list. This helps you to avoid unmanageably long lists of files in the Results list.
Allow Editing in Results ListActivate this to edit attributes also in the Results list. Otherwise, editing can only be done in the Attribute Inspector.
Scan Folders only when MediaBay is openActivate this to scan Cubase for media files when the MediaBay window is open. Otherwise, the folders are scanned in the background even when the MediaBay window is closed.
During playing back or recording no folder scans are performed.
Scan unknown File TypesActivate this to open and scan any file in the search location and ignore files that cannot be recognized.
Map Input Bus Metering to Audio Track (in Direct Monitoring)This allows you to map the input bus metering to monitor-enabled audio tracks, giving you the opportunity to watch the input levels of your audio tracks when working in the Project window. For this to work, activate Direct Monitoring in the Device Setup dialog.
If this option is activated, audio tracks show the metering signal from the input bus to which they are routed as soon as the track is monitor-enabled. Note that the tracks are mirroring the input bus signal, that is, you will see the same signal in both places. When using mapped metering, any functions, such as trimming, that you apply to the audio track are not reflected in its meters.
If this option is not activated, metering works as usual.
 Meters’ Peak Hold Time
This allows you to specify for how long the peak levels are held in the meters. For this to work, deactivate Meters - Hold Forever in the MixConsole.
 Meters’ Fallback
This allows you to specify how quickly the meters in the MixConsole return to lower values after signal peaks.
On this page you can assign colors to level meter values to quickly identify what levels are reached. You can adjust the colors for the channel meter or the master meter. For the master meter you can only make changes for the Digital Scale scaling mode. Changes take effect when you click Apply or OK.
To adjust the levels and colors, activate the channel meter or master meter option and proceed as follows:
To specify the level for a color change, double-click a handle to the right of the meter scale and enter the level (dB) value. Note that for dB values less than 0, you must add a minus sign before the entered number. You can also click a handle and drag it to a specific level. Press Shift for more accurate positioning. Alternatively, you can nudge with the Up Arrow/Down Arrow keys. Press Shift for faster positioning.
To assign a color, click the upper or lower part of a handle, and use the color selector pane to select a color. Selecting the same color for the upper and lower part of the handle results in a meter that changes its colors gradually, while different colors indicate level changes even more precisely.
To add more color handles, click Add, or Alt-click at a level position to the right of the meter scale. Each new handle is automatically associated with a default color.
To remove a handle, select the handle and click Remove, or Ctrl/Cmd-click the handle.
 Deactivate Punch In on Stop
If this option is activated, Punch In on the Transport panel is automatically deactivated whenever you enter Stop mode.
Stop after Automatic Punch OutIf this option is activated, playback will automatically stop after automatic Punch Out (when the Project Cursor reaches the Right Locator and Punch Out is activated on the Transport panel). If the Post-roll value on the Transport panel is set to a value other than zero, playback will continue for the set time before stopping.
This allows you to specify for how many seconds any incoming audio you play is captured in buffer memory during playback or in stop mode.
This allows you to specify what happens if you record Wave files that are larger than 4 GB.
To split the Wave file, activate Split Files.
Use this if you work on a FAT32 file system that supports only file sizes up to 4 GB.
To save the Wave file as RF64 file, activate Use RF64 Format.
RF64 files use the .wav extension. However, they can only be opened with an application that supports the RF64 standard.
If this option is activated, Cubase calculates the waveform image and displays it during the actual recording process.
This realtime calculation uses some extra processing power.
Description
Author
Reference Value
Record-Enable allows MIDI ThruActivate this option if you do not want record-enabled MIDI or instrument tracks to echo incoming MIDI data. This prevents hearing doubled notes on record-enabled tracks to which a VST instrument is assigned.
Snap MIDI Parts to BarsActivate this to lengthen recorded MIDI parts automatically to start and end at whole bar positions. If you are working in a Bars+Beats-based context, this can make editing (Moving, Duplicating, Repeating, etc.) easier.
 MIDI Record Catch Range in ms
When you record starting at the left locator, this setting helps you make sure that the very start of the recording is included. If you raise the Record Catch Range, Cubase will catch the events played just before the recording start point, eliminating this problem.
Retrospective RecordIf this option is activated, the program captures MIDI input in buffer memory, even when not recording. The contents of the buffer memory can then be retrieved and turned into a MIDI part on a record-enabled MIDI track. This therefore allows you to capture any MIDI notes you play in stop mode or during playback and later turn them into a recorded MIDI part.
 Retrospective Record Buffer Size
Use the Retrospective Record Buffer Size setting to determine how much MIDI data can be captured in the buffer.
ASIO Latency Compensation Active by DefaultThis determines the initial state of the ASIO Latency Compensation button in the track list for MIDI or instrument tracks.
If you record live on a VST instrument, you usually compensate the latency of your audio card by playing too early. In consequence, the timestamps are recorded too early. By activating this option, all recorded events are moved by the current latency, and playback sounds like during the recording situation.
Add Latency to MIDI-Thru ProcessingThis determines the initial state of the ASIO Latency Compensation button in the track list for MIDI or instrument tracks.
If you record live on a VST instrument, you usually compensate the latency of your audio card by playing too early. In consequence, the timestamps are recorded too early. By activating this option, all recorded events are moved by the current latency, and playback sounds like during the recording situation.
 Replace Recording in Editors
This affects the result of recording in a MIDI editor when Replace Mode is selected (Linear Record Mode on the Transport panel):
None
Nothing is replaced, even though Replace Mode is selected.
Controller
Only controller data is replaced, not notes.
All
Replace mode works as usual - notes and controllers are replaced when recording.
If this option is activated, as soon as you add a symbol, the program switches back to the Object Selection tool. If this option is deactivated, the Draw tool remains active after inserting a symbol.
If this option is activated, you need to double-click with the Object Selection tool in a Palette to activate the Draw tool. If this option is deactivated, a single click is enough to bring out the Pencil.
If this option is activated, crescendo symbols are never “slanted”.
If this option is activated, and you move notes vertically (to transpose them), you will be restricted to pitches within the current key.
If this option is activated, and you click on either note in a tied note pair, both notes will be selected.
If this option is activated, pressing AltGr + Ctrl on Windows or Alt-Cmd on Mac OS and adjusting the spacing of staves applies the spacing to all staves on the current page and on all the following pages. If this option is deactivated, the spacing is only applied to the current page.
This option affects the Auto Layout functions “Hide Empty Staves” and “Optimize All”. When “Don’t hide first staff” is activated, staves in the very first grand staff will not be hidden, even if they are empty.
Normally, braces are only shown in Page Mode. With this option activated they will also be visible in Edit Mode.
Normally, when you open a Property window or any non-modal score dialog (e. g. Set Note Info or Score Settings), you can adjust the settings and click Apply to apply the changes without closing the window. If this option is activated, clicking Apply closes the window.
If this option is activated the Project cursor position is shown as a vertical line in the score. You can click and drag the line to move the cursor or hold down Ctrl/Cmd and click anywhere in the score to move the cursor directly there.
If this option is activated the pitch of inserted notes is indicated.
If this option is activated and you insert or drag a note in the score, a tooltip will appear below the pointer, showing the current pitch and position. If you feel screen redraws are too slow, you may want to turn this feature off.
If this option is activated, the endpoints of slurs will snap to notes when you draw or move them.
If there are more than one part on a track, and you open score edit for one of these parts, the other parts are displayed as “empty space” to preserve the layout. If this option is activated, this empty space is avoided, so you can print this single part without endless rests.
Note that this option will erase the layout for the whole track! The next time you open the entire track, the previous layout will be overwritten with the layout settings you made for the single edited part.
If this option is activated, double-clicking on a staff will switch between display of either the whole track or the current part.
Note that in this case, the Score Settings dialog will only open if you select the “Settings...” option on the Scores menu.
The behavior of the Layout tool was different in older versions of Cubase. Activate this option if you have an old project in which the Layout tool was used to ensure that the project is displayed as expected.
If this option is activated, any notes outside the Note Limits range set in the Score Settings dialog (Staff page - Options tab) will be hidden.
If this option is activated, you can insert notes without pressing Return.
If this option is activated, the length of the previous note is changed on inserting notes.
If this option is activated, you must hold down Alt to insert notes.
If this option is activated, you can insert notes by pressing the keys that correspond to the note on the virtual keyboard (qwerty).
This is used in 2 cases:
In Edit Mode to set how many bars are shown across the page.
In Page Mode to decide how many bars there are shown across the page in a new layout.
When using the Auto Layout function, you will be asked for the maximum number of bars across the page, overriding this setting.
This page contains options related to playback, recording and positioning.
Playback Toggle triggers Local PreviewIf this option is activated, you can use the Space on your keyboard to start/stop “local” playback of the selected file in the Sample Editor or the Pool.
When the Sample Editor is not open or when there is no audio file selected in the Pool, the Space still toggles the “global” project playback.
If this option is deactivated, the Space is used to start/stop playback of the project.
If this option is activated, all frame based display formats (“.fps” and “.dfps”) will also show subframes. There are 80 subframes per frame.
 User-definable Frame Rate
This is where you set the frame rate (the number of frames per second) for the Display format “User”. This frame rate will then be used in every ruler for which you select the User display format.
Return to Start Position on StopIf this option is activated and you stop playback, the project cursor automatically returns to the position where recording or playback last started.
If this option is deactivated and you stop playback, the project cursor remains at the position where you stop playback.
If you click Stop again, the project cursor returns to the position where recording or playback last started.
 Stop playback while winding
You can use the winding functions during playback. If this option is activated, audio playback is stopped as soon as you click Rewind or Fast Forward on the Transport panel.
If this option is deactivated, audio playback will continue until you release Rewind or Fast Forward.
These options affect the fast forward/rewind speed.
If Adjust to Zoom is activated, the wind speed will be adapted to the horizontal zoom factor.
If you zoom in very close for detailed editing, you probably do not want to have a high fast forward/rewind speed. Because of this, the Speed Factor does not have any effect in this mode. The Fast Wind Factor still applies though.
If Fixed is activated, the wind speed will always be the same regardless of the horizontal zoom factor.
Use the Speed Factor option to set the wind speed. You can set a value between 2 and 50. The higher the value, the faster the wind speed will be.
If Adjust to Zoom is activated, this has no effect.
Use the Fast Wind Factor to set the wind speed multiple for fast winding.
If you press Shift while fast forwarding or rewinding, the wind speed will increase. The increase in speed is a multiple of the Speed Factor. Meaning that if you set the Fast Wind Factor to 2, the wind speed will be twice as fast. If you set it to 4, the wind speed will be 4 times as fast, etc. You can set a value between 2 and 50.
Zoom while Locating in Time ScaleIf this option is activated, you can zoom in or out by clicking in the Ruler and dragging down or up.
Locate When Clicked in Empty SpaceIf this option is activated, you can move the Project Cursor by clicking anywhere in an “empty” area of the Project window.
Scrub VolumeThis lets you set the playback volume for the Scrub function in the Project window and audio editors.
Use High Quality Scrub ModeWhen you activate this option, effects are enabled for scrubbing and the resampling quality is higher. However, scrubbing will be more demanding on the processor.
Use Inserts While ScrubbingWhen you activate this option, you can activate insert effects for scrubbing with the shuttle speed control. By default, insert effects are bypassed.
 Default Stereo Panner Mode (Cubase Pro only)
This allows you to specify the default pan mode for inserted audio tracks (Stereo Balance Panner, Stereo Dual Panner or Stereo Combined Panner).
Connect Sends automatically for each newly created ChannelWhen this option is enabled, creating a new audio or group channel will automatically connect the send routing for existing FX channels. Note that this option is disabled by default to save memory resources.
Instruments use Automation Read All and Write AllIf you deactivate this option, the Read and Write automation status in VST instrument panels are not affected by the “Activate/Deactivate Read for All Tracks” and “Activate/Deactivate Write for All Tracks” automation switches.
Mute Pre-Send when MuteIf this option is activated, sends set to “Pre-fader” mode will be muted if you mute their channels.
 Default Send Level
This allows you to specify a default level for your send effects.
Group Channels: Mute Sources as wellBy default, when you mute a group channel no audio will pass through the group. However, other channels that are routed directly to that group channel will remain unmuted. If any of those channels have cue sends routed to other group channels, FX channels or output busses, those will still be heard.
If Group Channels: Mute Sources as well is activated, muting a group channel will cause all other channels directly routed to it to be muted as well. Pressing mute again will unmute the group channel and all other channels directly routed to it. Channels that were muted prior to the group channel being muted will not remember their mute status and will be unmuted when the group channel is unmuted.
Group Channels: Mute Sources as well does not affect how mute automation is written. Writing mute automation on a group channel only affects the group channel and not channels routed to it. When writing the automation you will see the other channels being muted when this option is checked. However, upon playback, only the group channel will respond to the automation.
 Delay Compensation Threshold (for Recording)
Cubase features full delay compensation - any delay inherent in the VST plug-ins you use will automatically be compensated for during playback. However, when you play a VST instrument in realtime or record live audio (with monitoring through Cubase activated), this delay compensation may result in added latency. To avoid this, you can click the Constrain Delay Compensation button on the toolbar or the Transport zone of the Project window. This function tries to minimize the latency effects of the delay compensation, while maintaining the sound of the mix as far as possible.
The Delay Compensation Threshold setting is a kind of “tolerance” setting for the Constrain Delay Compensation function - only plug-ins with a delay higher than this threshold setting will be affected by the Constrain Delay Compensation function. By default, this is set to 0.0 ms, which means that all plug-ins will be affected (e. g. turned off) when you activate Constrain Delay Compensation. If you feel that a little latency is acceptable, you can raise this threshold value.
Do not Connect Input/Output Busses When Loading External ProjectsActivate this option to load external projects without automatically connecting their input and output busses to the ASIO ports of your system. If you often work with projects created on computers that have ASIO configurations different from the configurations of your own system, this option prevents unwanted audio connections.
Activate ‘Link Panners’ for New Tracks (Cubase Pro only)Activate this to activate Link Panners by default for new tracks so that the channel sends section always mirrors the Pan settings made in the channel fader section.
 Auto Monitoring
Determines how Cubase handles monitoring (listening to the input signal during recording). The following options are available:
Manual
This option allows you to turn input monitoring on or off by clicking the monitor button in the track list, Inspector, or MixConsole.
While Record Enabled
With this option you will hear the audio source connected to the channel input whenever the track is record-enabled.
While Record Running
This option switches to input monitoring only during recording.
Tapemachine Style
This option emulates standard tapemachine behavior: input monitoring in Stop mode and during recording, but not during playback.
The automatic monitoring options apply when you are monitoring through Cubase, or when you are using ASIO Direct Monitoring. If you are monitoring externally (listening to the input signal from an external mixer, for example), select the “Manual” mode and keep all audio monitor buttons turned off in Cubase.
Warn on Processing OverloadsWhen you activate this option, a warning message is displayed as soon as the CPU overload indicator (on the Transport panel) lights up during recording.
Warn Before Removing Modified EffectsIf this option is activated, a dialog will appear whenever you remove an effect plug-in for which you have made parameter changes, asking for confirmation as to whether you really want to remove the effect.
If you do not want this dialog to appear and modified effects to be removed without confirmation, leave this option deactivated.
Open Effect Editor after Loading itIf this option is activated, loading an effect or VST instrument (e. g. in one of the plug-in slots of the Send or Insert sections) will automatically open the control panel for the plug-in.
 Create MIDI track when loading VSTi
This pop-up menu allows you to what specify happens when you add a VSTi in the VST Instruments window. The following options are available:
Always
When this is selected, a corresponding MIDI track will always be created when you add a VST instrument.
Do not
When this is selected, no MIDI track will be created when you add a VSTi in the VST Instruments window. This is the behavior from earlier versions of Cubase.
Always ask to
When this is selected, you will be asked whether a corresponding MIDI track is created when you add a VSTi in the VST Instruments window.
Synchronize Plug-in Program Selection to Track SelectionIf you route multiple MIDI tracks to multi-timbral instruments and activate this option, track selection and plug-in program selection are synchronized.
Suspend VST 3 plug-in processing when no audio signals are receivedIf this option is activated, VST plug-ins will not consume any CPU power during “silent” passages, i. e. when no audio is passing through them. This can improve system performance noticeably.
Note however that this might lead to situations where you loaded more plug-ins in Stop mode than the system will be able to play back simultaneously. As a safety measure, try playing back the part of your project which contains the largest number of audio events to make sure that your computer system can handle the current number of VST plug-ins.
Plug-in Editors “Always on Top”If this option is activated, the control panels for effect plug-ins and VST instruments will always be shown on top of other windows.
Show Control Room Volume in Transport PanelIf this option is activated, the Transport panel will display the Control Room Volume if the Control Room is enabled. If the Control Room is disabled, the volume of the Main Mix bus will be shown in the Transport panel.
 Auto Disable Talkback Mode
Allows you to specify if Talkback is disabled during recording, during playback and recording, or not at all.
Set the Talkback DIM level to 0 dB so as not to radically change the mix level when punching in and out of record mode.
Use Phones Channel as Preview ChannelIf this option is activated, the Phones channel will be used for monitoring. If this option is deactivated, the Monitor channel in the Control Room will be used.
Dim Cue during TalkbackIf this option is activated, the cue mix heard in a studio will be dimmed (by the amount set in the Talkback Dim Level field in the Control Room) for as long as the Talkback channel is used. If this option is deactivated, the cue mix level remains the same during Talkback.
Exclusive Device Ports for Monitor ChannelsIf this option is activated, the port assignment for Monitor channels is exclusive. If your scenario does not require you to assign ports to several Monitor channels, it is recommended to activate this option. This way you can make sure that you do not accidentally assign ports to inputs/outputs and Monitor channels at the same time.
This setting is saved with the Control Room presets.
 Reference Level
The reference level is the level that is used in calibrated mixing environments, such as film dubbing stages. Use this option to specify the reference level that can be assigned to the Control Room level.
You can also manually adjust the reference level in the Control Room settings.
Main Dim VolumeUse this to set the amount of gain reduction applied to the Control Room channel when the DIM button is activated.
Inhibit warning when changing the Sample DataWhen you are modifying audio material that is used in several places in the project in the Sample Editor, a warning message is shown. This message can be deactivated: If you activate the Please, don’t ask again checkbox, the message will not be displayed in the future (when editing the pitch or time of audio material that is used several times in one project).
To display this message again, and thus be informed whether the audio is used in other places, deactivate this option.
Inhibit warning when applying Offline ProcessesWhen you are applying offline processes (e. g. with the Envelope or Normalize functions) to audio material that is used in several places in the project, a warning message is shown. This message can be deactivated: If you activate the Please, don’t ask again checkbox, the message will not be displayed in the future.
To display this message again, and thus be informed whether the audio is used in other places, deactivate this option.
Extract Audio on Import Video FileIf this option is activated and you import a video file, the audio data of the video is automatically extracted and saved as a separate audio clip.
 Thumbnail Memory Cache Size
The value entered here determines how much memory is available for displaying thumbnails. The image of a video is buffered in the thumbnail memory cache. Whenever you move to another image and there is no memory capacity left, the “oldest” picture in the cache is replaced by the current one. If you have long video clips and/or work with a large zoom factor, you may have to raise this value.


